Svelte ve JavaScript ile Basit ve Dinamik Bir Tooltip Yaratma Yöntemi
Yayın: 19 Haziran 2024
Arka Plan
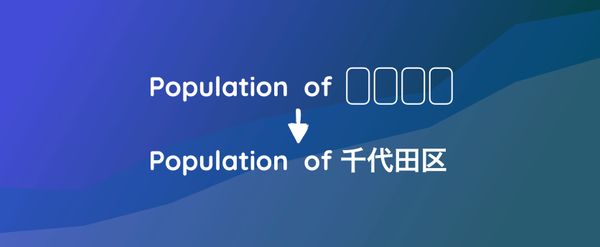
Web sayfasında tüm bilgileri gösteremediğinizde, ek bilgileri talep üzerine göstermek için bir araç ipucu kullanışlı olur.
Bu, şu şekilde görünen bir bilgi düğmesi olabilir:
Bilgi düğmesinin üzerine gelerek size ne söyleyeceğini görün
Bilgi düğmesinin üzerine gelindiğinde bazı bilgilerin gösterildiğini ve bilgi düğmesinin üzerine geldikçe bu bilgilerin kullanılabilir hale geldiğini görebilirsiniz.
Şimdi JavaScript ve Svelte ile bir araç ipucu nasıl oluşturabiliriz görelim.
Amaç
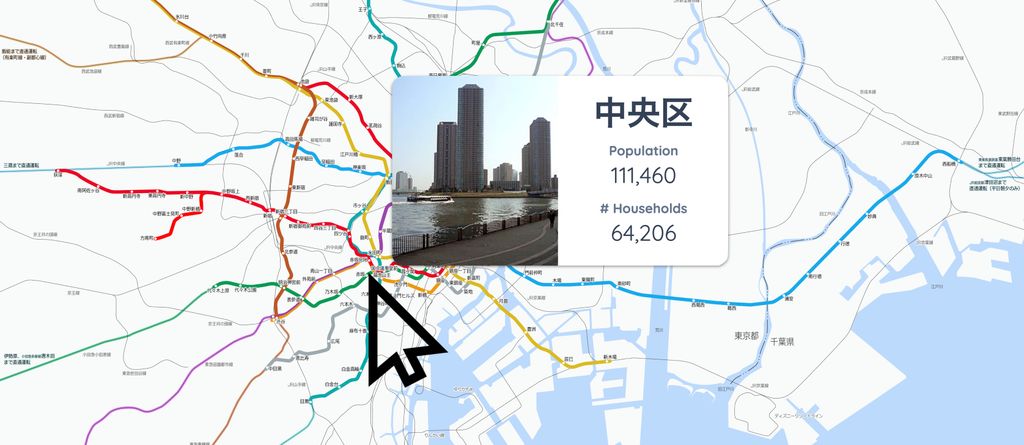
Bu blog yazısında, JavaScript ve Svelte kullanarak, fare konumuna bağlı olarak konumu ayarlanacak minimum dinamik bir araç ipucu oluşturacağız.
Araç ipucu ayrıca HTML'yi desteklemelidir, çünkü araç ipucunda başlıklar ve resimler gibi zengin içerikler göstermek istiyoruz.
Yöntem
İlk olarak, üzerine gelindiğinde bir araç ipucu göstermek istediğiniz bir öğe ekleyin:
<Info size={50} color="#0ea5e9" />Şu anda bu düğme işlevsiz. Şimdi, araç ipucunu etkinleştirmek için arka ucu geliştirelim:
<script>
// OnMount is needed to find all tooltips once the component is mounted
import { onMount } from 'svelte';

// info: the tooltip DOM element (info window)
// container: main container  DOM element in the page
// innerWidth: window innerWidth. Use to calculate the location of info window
// innerHeight: window innerHeight. Use to calculate the location of info window
let info, container, innerWidth, innerHeight;

// showInfo: Used to control whether to show an info
$: showInfo = false;

// Function that controls the location of tooltip based on mouse location
function handleMouseMove(event) {

	// Get mouse location
	let x = event.clientX;
	let y = event.clientY;

	// Get container location
	let rect = container.getBoundingClientRect();

	// If mouse is in the top half of the screen, set its 'top' style, otherwise none
	info.style.top = y < innerHeight / 2 ? y - rect.top + 10 + 'px' : '';

	// If mouse is in the bottom half of the screen, set its 'bottom' style, otherwise none
	info.style.bottom = y < innerHeight / 2 ? '' : rect.bottom - y + 10 + 'px';

	// If mouse is in the left half of the screen, set its 'left' style, otherwise none
	info.style.left = x < innerWidth / 2 ? x - rect.left + 10 + 'px' : '';

	// If mouse is in the left right of the screen, set its 'right' style, otherwise none
	info.style.right = x < innerWidth / 2 ? '' : rect.right - x + 10 + 'px';
}

onMount(() => {

	// Get all elements which require showing a tooltip when hovered
	let tooltips = document.querySelectorAll('[tooltip]');

	for (const element of Array.from(tooltips)) {

		// When hovered, show tooltip
		element.addEventListener('mouseenter', () => {
			showInfo = true;
			info.innerHTML = element.getAttribute('tooltip');
		});

		// When hover is gone, hide the tooltip element
		element.addEventListener('mouseleave', () => {
			showInfo = false;
			info.innerHTML = '';
		});
	}
});

</script>

// Get innerWidth and  innerHeight by binding to window
// Listen to mousemove on the window
<svelte:window bind:innerWidth bind:innerHeight on:mousemove={(e) => handleMouseMove(e)} />

// Overall Container. Bind to container variable.
// This is used to adjust the location of tooltip
<div class="flex gap-4 flex-col relative" bind:this={container}>

	<!-- Tooltip element. It's contents are only assigned when the user hovers over an info button -->
		<div bind:this={info}
		class={`z-50 bg-white px-4  max-w-[500px] py-2 flex absolute rounded overflow-hidden shadow-xl hidden`}></div>

	<!-- Info button. This triggers the tooltip -->
	<div class="inline-block"
		tooltip="<p class='font-bold'>Thanks for checking out this tooltip. Much appreciated.</p>">
		<Info size={50} color="#0ea5e9" />
	</div>
</div>
Uzun bir kod ve çoğu boilerplate kodudur, bu yüzden kodun 3 ana kısmına odaklanmak istiyorum.
1. Bilgi Öğesi
Bilgi öğeleri, bir araç ipucunu tetikleyen öğelerdir. Örneğimizde, bir Bilgi düğmesiydi.
Bu öğelerin bir tooltip özniteliği olmalıdır. Bu özniteliğin değeri,
bu öğenin üzerine gelindiğinde araç ipucu içinde göstermek istediğiniz HTML öğesi olmalıdır.
// Info button. This triggers the tooltip
<div class="inline-block"
	tooltip="<p class='font-bold'>Thanks for checking out this tooltip. Much appreciated.</p>">
	<Info size={50} color="#0ea5e9" />
</div>
2. Olay Dinleyicileri
Tüm bilgi öğelerine tooltip özniteliği atamak, bileşen monte edildiğinde
onları tanımlamamıza yardımcı olur.
Tooltip özniteliğine sahip tüm öğeler tanımlandıktan sonra, mouseenter olayını dinler ve araç ipucunu gösteririz. Bu olay ayrıca tooltip özniteliğinin değerini araç ipucunun
HTML'sine atar.
Fare bilgi öğesinden ayrıldığında, araç ipucu gizlenmelidir.
Araç ipucunun görünürlüğünü bu şekilde kontrol ederiz:
onMount(() => {

	// Get all elements which require showing a tooltip when hovered
	let tooltips = document.querySelectorAll('[tooltip]');

	for (const element of Array.from(tooltips)) {

		// When hovered, show tooltip
		element.addEventListener('mouseenter', () => {
			showInfo = true;
			info.innerHTML = element.getAttribute('tooltip');
		});

		// When hover is gone, hide the tooltip element
		element.addEventListener('mouseleave', () => {
			showInfo = false;
			info.innerHTML = '';
		});
	}
});
3. Araç İpucu Konumlayıcısı
Bilgi öğesinin üzerine gelindiğinde araç ipucunu gösterip gizleyebildiğimize göre, şimdi araç ipucunun nerede konumlandırılacağını belirlememiz gerekiyor.
Aşağıdaki kod bunu gerçekleştirmekten sorumludur:
// Function that controls the location of tooltip based on mouse location
function handleMouseMove(event) {

	// Get mouse location
	let x = event.clientX;
	let y = event.clientY;

	// Get container location
	let rect = container.getBoundingClientRect();

	// If mouse is in the top half of the screen, set its 'top' style, otherwise none
	info.style.top = y < innerHeight / 2 ? y - rect.top + 10 + 'px' : '';

	// If mouse is in the bottom half of the screen, set its 'bottom' style, otherwise none
	info.style.bottom = y < innerHeight / 2 ? '' : rect.bottom - y + 10 + 'px';

	// If mouse is in the left half of the screen, set its 'left' style, otherwise none
	info.style.left = x < innerWidth / 2 ? x - rect.left + 10 + 'px' : '';

	// If mouse is in the left right of the screen, set its 'right' style, otherwise none
	info.style.right = x < innerWidth / 2 ? '' : rect.right - x + 10 + 'px';
}
Yukarıdaki kod zekice, çünkü ekranı 4 bölüme ayırır ve araç ipucunu buna göre gösterir, böylece ekranın dışına taşmaz.
Aşağıdaki bölümlerin üzerine gelerek bunun gerçek hayatta nasıl çalıştığını görün:
Bilgi öğesinin konumuna bağlı olarak, araç ipucunu akıllıca konumlandırdığımızı görebilirsiniz. Harika çalışıyor değil mi?
Sonuç
Bu blog yazısında, Svelte ve JavaScript kullanarak bir araç ipucu geliştirdik.
Çözümümüz, araç ipucu göstermek istediğiniz öğelere sadece tooltip özniteliği eklemenizi gerektirir. Bu özniteliğin değeri araç ipucunda gösterilecektir.
Çözümümüz HTML'yi kabul eder ve araç ipucunun ekranın dışına taşmaması için akıllıca konumlandırır.
Sorularınız var mı? Aşağıda bana bildirin.
Bir sonraki duyuruya kadar, mutlu kodlamalar!
Bu blog İngilizce'den LLM ile çevrilmiştir. Herhangi bir belirsizlik durumunda İletişim sayfasından bana ulaşabilirsiniz.
Yorum bırak
Yorumlar
Diğer bloglara bak

2026/03/24
Claude Code Ayarlarım: Başında Durmadan Maksimum Verim
2025/07/07
Q-Learning: İnteraktif Pekiştirmeli Öğrenmenin Temeli
2025/07/06
Optimizasyon Algoritmaları: SGD, Momentum ve Adam
2025/07/05
Karakterlerden Kelimelere: Japonca BPE Tokenizer
2024/06/17
JavaScript ile Tokyo'nun İnteraktif Haritasını Oluşturun
2024/06/14
Matplotlib'de Japonca Karakter Sorununu Çözme Yöntemi

2024/06/13
Kitap İncelemesi | Ötekiyle Konuşmak by Malcolm Gladwell

2024/06/07
Japonca'da En Sık Kullanılan 3.000 Kanji
2024/06/07
VSCode'da Regex Kullanarak Replace Yapma Yöntemi

2024/06/06
Svelte'de Readable Store Kullanmayın
2024/06/05
Dosyaları Gzip ve Pako ile Sıkıştırarak Web Sitesinin Yükleme Hızını Artırın
2024/05/31
Web Sayfasında Farenin Uzerinde Oldugu Kelimeyi JavaScript ile Bulun

2024/05/29
Svelte ve SVG ile Interaktif Harita Oluşturun
2024/05/28
Kitap İncelemesi | Geleneklere Uymayanlar Dünyayı Nasıl İleri Taşıyor? by Adam Grant & Sheryl Sandberg
2024/05/27
Javascript Kullanarak Sudoku Nasıl Çözülür?
2024/05/26
Web Siteme Gelen Trafiği Bir Ayda Nasıl 10 Kat Artırdım?
2024/05/24
Hayat Bisiklet Sürmek Gibidir

2024/05/19
JavaScript'te Backtracking Algoritması ile Tamamlanmış Sudoku Oluşturun
2024/05/16
Tailwind Neden Harikadır ve Web Geliştirmeyi Nasıl Kolay Hale Getirir?
2024/05/15
Python ve Git Hooks ile Otomatik Olarak Site Haritası Oluşturma
2024/05/14
Kitap İncelemesi | Çok Yönlü - Başarı İçin Neden Çok Şeyle İlgilenmeliyiz? by David Epstein
2024/05/13
Svelte ve SvelteKit nedir?
2024/05/12
SvelteKit ile Internationalization (Çoklu Dil Desteği)
2024/05/11
Svelte'de Caching ile Deploy Süresini Azaltın
2024/05/10
Svelte ve Intersection Oberver ile Lazy-Load

2024/05/10
Genetik Algoritma İle Hisse Senedi Portföyü Optimizasyonu
2024/05/09
ShapeFile Formatini SVG Formatina Degistirme Yontemi
2024/05/08
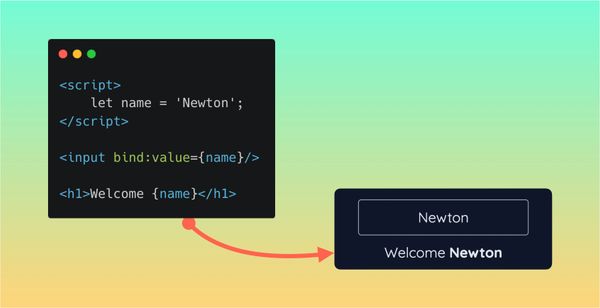
Svelte'de Reaktivite: Variables, Binding, ve Key Fonksiyonu

2024/05/07
Kitap İncelemesi | Savaş Sanatı - Sun Tzu
2024/05/06
Specialistlik Bitti. Yaşasın Generalistlik!

2024/05/03
2018 Milletvekili Seçimlerinde Yaşa Göre Parti Eğilimi
2024/05/01
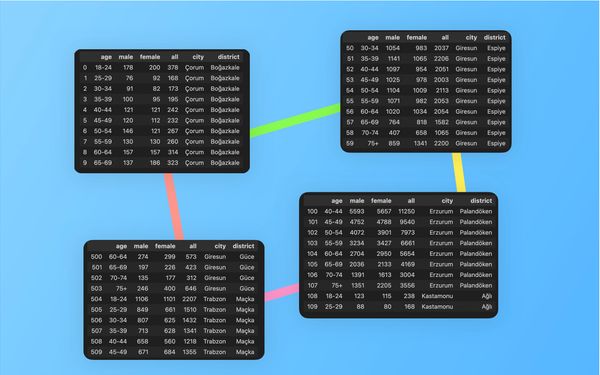
Python Selenium Ile Secmen Veritabani Olusturma
2024/04/30
Svelte ve Tailwind Ile Infinite Scroll Yapma Yontemi
2024/04/29
1 Yıl İçerisinde Japonca Konuşabilmek
2024/04/25
Svelte ve Tailwind ile Kullanıma Hazır Web Sitesi Şablonu

2024/01/29
Tembel Muhendisler Kotu Urunler Yapar

2024/01/28
Mukemmellik Uzerine
2024/01/28
MacBook'ta PDF'i PNG'ye Cevirme Yontemi
2023/12/31
2023'u Kapatiyoruz: Bu Yil Okunan 24 Kitap
2023/12/30
Python PIL Kullarak Foto Kolaji Yapma Yontemi
2024/01/09
Site Ziyaretcilerinin Alet ve Tarayicilarini Tespit Etme Yontemi
2024/01/19
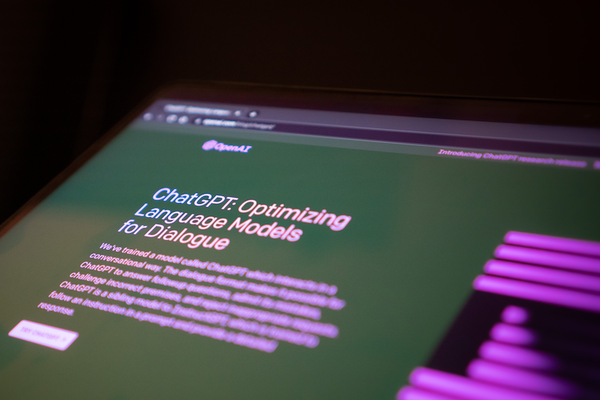
ChatGPT Cevap Anatomisi